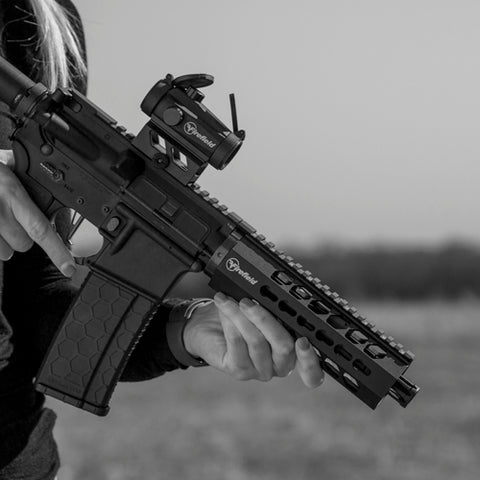
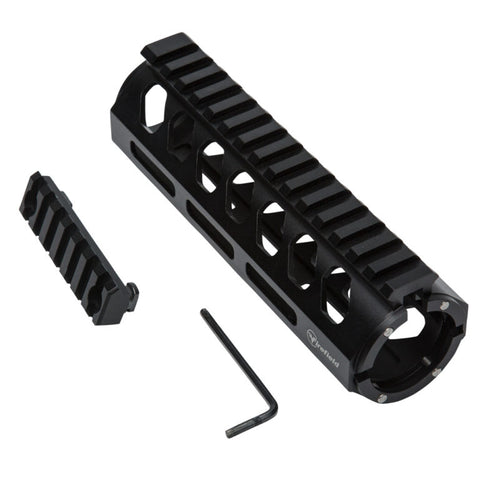
America’s most popular modern sporting rifle, the AR-15, has advanced greatly over the past decade. The era of basic plastic handguards is over. Upgrading your AR-15 handguards to a rail system is in.
With so many different accessories for ARs available now, handguards that do not offer mounting options just won’t cut it anymore. When rail systems and free-float handguards first hit the market, they were prohibitively expensive and mostly limited to military, law enforcement and competitive users.
Today, a great number of manufacturers are making rail systems standard options on their rifles so customers can easily mount things like flashlights, grips and lasers.
If your AR does not have one, upgrading is simple. Depending on your skill level and the type of rail purchased, you could do the work yourself and skip a visit to the gunsmith.

Upgrading Your AR-15 Handguards to a Rail System
When selecting rails, you generally have the choice between free-float and non-free-float (also known as drop-in) options.
Free-float rails do not make contact with the barrel, increasing the rifle’s accuracy due to barrel harmonics.
Therefore, the mounting systems for free-float rails are typically stronger and more rigid as well, but often require tools to install. Drop-in options are much easier to install and usually do not require the use of any tools.
Drop-in rails, like Firefield’s Edge Carbine Two-Piece Rail are, a great option for those who need a quick non-free-float upgrade option that enables them to reliably mount accessories.

AR-15 Rail Patterns and Designs
Three main options exist for rail designs: Picatinny (also known as MIL-STD-1913 Rail), Keymod and M-LOK. All three designs use interface systems for mounting sights, optics and accessories.
Picatinny rails are the oldest design of the three. In the 1980s, companies trying to standardize the Weaver design created the Picatinny rail. Picatinny Arsenal in New Jersey completed and standardized the design in the 1990s.
One of the earliest designs featuring a Picatinny rail was the upper receivers on M16 rifles and M4 carbines, giving them an easier option to mount optics. Eventually, enterprising gunsmiths incorporated the Picatinny rail into handguard designs.
These Picatinny-railed handguards gained notoriety and attention as “quad rails.”
More on the Picatinny
Also, the Picatinny rail design is older and heavier than other options mentioned, but remains very much relevant in the world of rail interface options.
They are still in use with the U.S. military and LE agencies nationwide. Most rail manufacturers still produce quad rail options. After Picantinny had been the standard for a couple of decades, Keymod emerged on the market.
Keymod rails quickly gained popularity due to their lightweight skeletonized design. They are also much thinner than Picatinny rails. People who already have Picatinny accessories can use Keymod adapters and Picatinny rail sections instead of purchasing new accessories.
Open-sourced to the public, the Keymod design is popular and industry-standardized. M-LOK, which stands for “Modular Lock,” is the newest mounting system, created by Magpul Industries.
M-LOK is not open sourced like Keymod. Any manufacturer can obtain free licensing with permission from Magpul. M-LOK currently seems to be the most popular, with Keymod trailing not far behind.
For a more in-depth analysis of handguards and rail systems, ARBuildJunkie has an excellent article on the topic.

Installation of Drop In Rails
The difficulty of installing a new rail depends on your ‘mounting’ method. Drop-ins are typically mounted very easily. Most times, laymen can install drop-in rails with basic hand tools or none at all.
The delta ring (or slip ring on “retro” rifles) needs be pulled back all the way to the rear, which will provide enough slack for the stock handguards to come loose. The new rail should be inserted in the reverse order that the old one was removed.
The forward part of the rail should fit underneath the endcap located to the rear of the front sight/gas block. Pull the delta ring back and align the two halves of the rail.

Installation of Free Float Rails
Free float rails can be more difficult to install and may require the use of tools. This process typically requires the removal of the barrel nut and possibly the barrel. We recommend supervision or installation by a certified gunsmith.
First, remove the old furniture. Installation may also require the removal of the muzzle device, gas block/front sight base, and handguard endcap.
After you remove the furniture and any necessary small parts, remove the barrel nut using a barrel nut wrench or AR armorer’s wrench.
Once the barrel nut is off, the delta ring assembly can be removed. If the barrel needs to be serviced or replaced, now would be the time to do so. The new barrel nut that came with the rail should now be installed and torqued down to proper specs outlined by the manufacturer.
More on Rails
If the rail is not designed to work with an A2-style FSB, a low-profile gas block should be purchased and installed, along with all gas system parts. Longer handguards that extend over the gas block, like the Firefield Verge Slim rails, are becoming increasingly popular.
Discard the handguard end cap or set it aside. Reinstall the gas system, slip the rail over the barrel and attach the barrel nut.
Final attachment method varies between different rails. Some rails clamp down onto the barrel nut and some attach via screws. Refer to the manufacturer instructions for this process.
Attach the rail to the barrel nut and properly torque it. Then, reinstall the muzzle device to complete the installation. At this point, a certified gunsmith should check the rifle for proper installation.
If you wish to learn more, ShootingSportsRetailer has a great article on this topic. Upgrading your AR-15 handguards to a rail system is never a bad idea.
AR Rail Handguards in a Nutshell
Rails are a great option for those who want to “modernize” their rifles. They allow for easy mounting of essential accessories like lights, lasers and grips.
Remember, having extra real estate on a rail can also help with stability, depending on the shooter’s grip and shooting stance.
Finally, it is important to remember that upgrades and modifications do not make a person a better shooter—training does. After you install that rail, hit the range and begin training!
If you want to hone your shooting skills, OutdoorLife has an excellent piece on training and improving accuracy.

