How to Sight in Your Red Dot
Alright, you’ve got yourself a brand new red dot sight. Nice choice. It’s lightweight, durable, and you notice that you don't need to close one eye when you aim. Nice, right? But you know that if you don't sight it in, you're not going to hit anything and you might as well be shooting at the sun. Let’s fix that.
Red Dot vs. Riflescope vs. Iron Sights: What’s the Difference?
Before we jump into the sight-in process, let’s talk about why a red dot sight isn’t the same as a riflescope or iron sights.
-
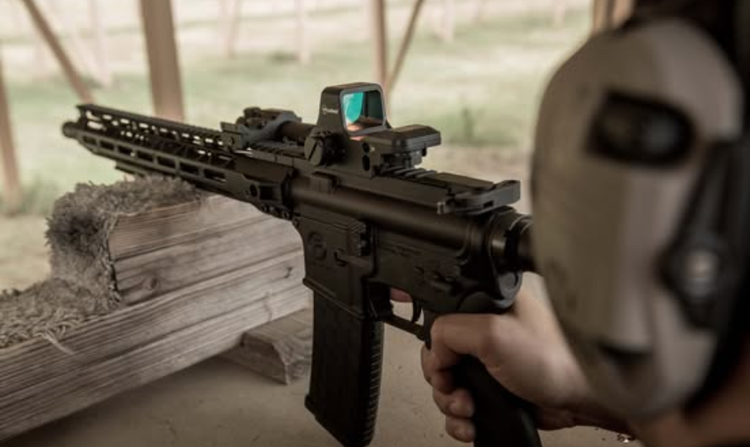
Red dots give you a single illuminated point of aim that doesn’t require lining up rear and front sights. You put the dot on the target and send it.
-
Iron sights require you to line up the front and rear sight, which takes more time (and eye strain) but doesn't rely on batteries.
-
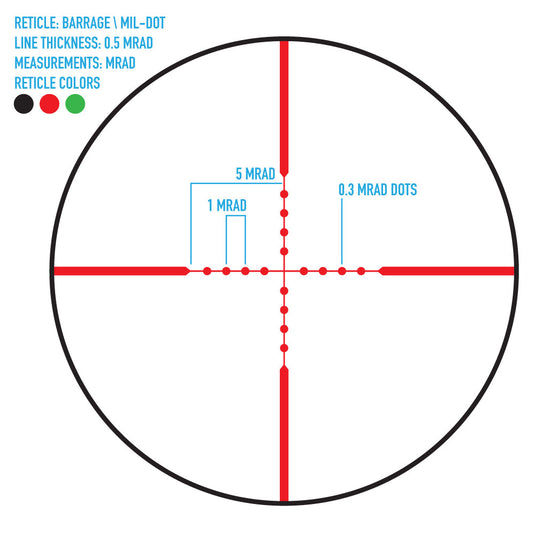
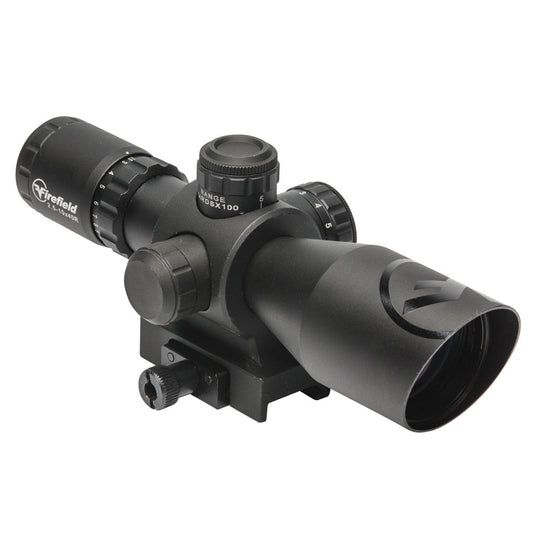
Riflescopes use magnification and internal reticles that stay fixed while you adjust the crosshairs to compensate for bullet drop and windage.
The key difference when zeroing is when you use a red dot sight, you actually see the dot move when you make adjustments. With a riflescope, the crosshairs stay put while the internal lenses shift to align your point of aim with the point of impact. It’s a subtle but crucial distinction.
Step 1: Set Up
First thing's first, find a stable shooting position—bench rest, sandbags, or a fancy tripod if you want to be extra precise. Set your target at 25 or 50 yards, depending on your firearm and intended use.
Mount your red dot sight securely to your rail. If it's loose, you’re in for a world of frustration. Double-check that it’s tight and level, use blue loctite if you have it available.
Step 2: The First Shots
Load up and fire a three-shot group at the center of your target. Don’t adjust anything yet.
Check where the shots landed. If they’re off, resist the urge to compensate by just “holding over.” That’s like trying to steer a car by leaning in your seat—just fix the alignment properly.
And whatever you do, don’t make the rookie mistake of firing a single shot and adjusting immediately. Why? Because a single round doesn’t tell you much—it could be a flier, an anomaly, or even just you pulling the shot. A three-shot group gives you an actual pattern to work with, showing you where your average point of impact is. Chasing your shots one at a time will only have you spinning dials and making unnecessary corrections, leaving you more frustrated than a cat trying to catch a laser pointer.
Step 3: Make Adjustments
Now, here’s where it gets a little different from sighting in a riflescope. With a red dot optic, when you turn the windage (left/right) and elevation (up/down) dials, you’ll see the actual dot reticle physically move in the window. That’s different from a riflescope, where your reticle stays in place and only the image inside shifts.
-
If your shots are hitting low, turn the elevation dial up (counterclockwise).
-
If your shots are hitting high, turn it down (clockwise).
-
If your shots are hitting left, turn the windage right (clockwise).
-
If your shots are hitting right, turn it left (counterclockwise).
Each click moves the dot a set distance (usually 1 MOA per click, which is about 1 inch at 100 yards or ½ inch at 50 yards). However, you should also be aware that many Firefield red dots have visible lasers. Adjusting the windage and elevation of your optic does not automatically adjust the point of impact of the laser. These must be adjusted separately.
Step 4: Fire, Adjust, Repeat
Take another three-shot group. Are you closer? If you are, keep making small adjustments until your shots are consistently hitting where your red dot is aimed. For your optic to be sighted in properly, you must keep your red dot's reticle consistently aimed at the center of your target. Your objective is to move your shot placement directly on top of your reticle. Resist the temptation to shoot somewhere else. Every time you miss, and you will miss, take a deep breath, check your mounting, and try again.
Step 5: Lock It In & Test It Out
Once you’re dialed in, it’s time to verify your zero. Fire a few shots from different positions—standing, kneeling, unsupported—to make sure the dot stays true. If your optic is solid and you followed the steps right, you should be good to go.
Final Pro Tips
-
Co-Witnessing – If you’re using backup iron sights, decide between absolute or lower 1/3 co-witness before zeroing.
-
Battery Check – The Impact XLT has a solid battery life, but always carry a spare. Nothing’s worse than a dead sight when you need it.
-
Reconfirm Zero Regularly – If you drop your rifle or travel a lot, re-check your zero before trusting it in the field.
Now Go Shoot
Zeroing your Firefield Impact XLT doesn’t have to be rocket science. Follow these steps, make your adjustments, and get that dot dialed in. Once you’re set, enjoy faster target acquisition and more confident shooting. Now go make some steel ring!
To shop Firefield red dots, click here.
Frequently Asked Questions
1. What is the difference between a red dot sight, riflescope, and iron sights?
A red dot sight provides a single illuminated point of aim, while riflescope uses magnification and internal reticles, and iron sights require aligning front and rear sights.
2. Why is it important to fire a three-shot group before making adjustments?
Firing a three-shot group helps determine the average point of impact and prevents making unnecessary corrections based on single shot anomalies.
3. How do you adjust a red dot sight for elevation and windage?
To adjust elevation, turn the dial counterclockwise if shots are hitting low and clockwise if hitting high. For windage, turn the dial clockwise if shots are hitting left.
4. Can I compensate for shot placement by just holding over with a red dot sight?
No, it's not recommended to compensate by holding over as it can lead to inaccurate shooting. Properly adjust the sight for precise aiming.
5. What is the recommended distance to set up your target when sighting in a red dot sight?
Set up your target at 25 or 50 yards, depending on your firearm and intended use, for accurate sighting in.